Diane's Vintage Zest!: sewing

Spicy Chorizo Cornbread Stuffing

A spicy spin on my Cornbread Stuffing that EVERYONE loves!

Sweet Potato Souffle for Thanksgiving

One of my most popular recipes EVER, and just in time for Thanksgiving!

DIY Painted Photo Backdrops

Super easy backdrops for your photo, plus a few tips!

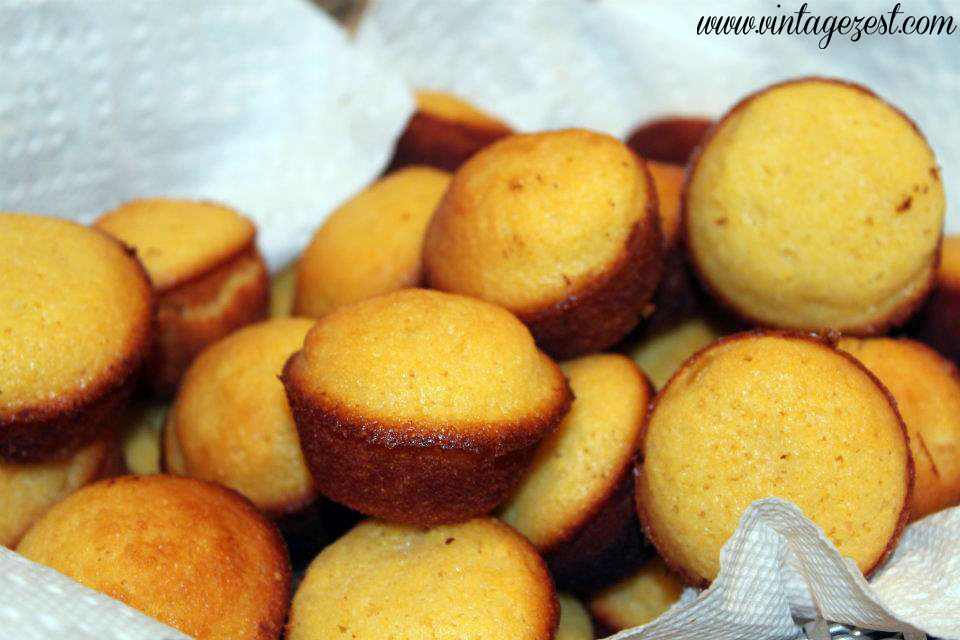
Golden Sweet Corn Bread Mini Muffins

A sweet spin on traditional cornbread!

Easy Sweet Potato Pie (without a crust!)

The easiest (and healthiest) pumpkin pie recipe ever!

Showing posts with label sewing. Show all posts

How to: DIY a Dress Upcycled from Oversized T-shirts


Remember my DIY Shibori Dress post from waaay back when?  Well, I promised to share a tutorial on how I made the dress upcycled from two oversized T-shirts.  Here it is!

A few words: I made roughly a medium sized dress from two XL T-shirts, but the size will be adjusted to your size when you make your pattern.

Disclaimer: I'm not a sewing expert and it's been some time since I wrote a tutorial.  Please be nice!


How to: DIY a Dress Upcycled from Oversized T-shirts on Diane's Vintage Zest!  #sewing #tutorial


How to: DIY a Dress Upcycled from Oversized T-shirts
Print

What You Will Need

  • Two oversized T-shirts  (the bigger, the better!)
  • Matching thread
  • Pattern (either an existing piece of clothing or a commercial sewing pattern)
  • Chalk
  • Scissors


How to: DIY a Dress Upcycled from Oversized T-shirts on Diane's Vintage Zest!  #sewing #tutorial


Directions


1.  You will use one of the shirts for the top of your dress.  Mark with chalk, using your pattern piece.  OR if you are using an existing garment, outline the top, making sure to add the seam allowance of your choice (1/4", 3/8", 1/2", etc.).


How to: DIY a Dress Upcycled from Oversized T-shirts on Diane's Vintage Zest!  #sewing #tutorial


Tip:  If the garment is made of a stretchier material than the T-shirt, add a bit more to the seam allowance because the finished garment might be too tight!

How to: Mend a Ripped Seam

Today, I have a super easy tutorial for sewing newbies on how to mend a ripped seam.  Why is this necessary?  If you have an over-excitable man in your life who lunges during World Cup matches with pants that don't stretch... well, this will save you a trip to the tailor or from tossing your favorite garment in the trash.  :)

You can use the same technique with or without a sewing machine, so if you are handy but not skilled with a machine, you can still fix those pants yourself.


How to: Mend a Ripped Seam on Diane's Vintage Zest!


How to Mend a Ripped Seam
What You Will Need

  • Item to be fixed
  • Thread that matches your garment
  • Sewing machine OR needle
  • Pins (optional, but useful depending on size of rip)


Directions

  1. Turn your item inside out and examine the rip.


Shibori Print Dress

This is a sponsored post from I Love to Create for the Blueprint Social. #tiedyeyoursummer #tdys


Today, I have a fun oldie-but-goodie craft with a new twist!  I received a package of white T-shirts and beautiful tie dye colors as part of Tie Dye Your Summer.  I put on my thinking cap on how I could make something completely different and it came to me... a Shibori Print Dress!


Shibori Print Dress on Diane's Vintage Zest!


I decided to make it an ombre dress with more saturated colors on top, down to almost white at the bottom.  I love how easy it was to make this dress with the Tulip One-Step Tie-Dye and I definitely want to make a few more items of clothing using this technique.  Want to see how I did it?  Read on for the tutorial!


Shibori Print Dress on Diane's Vintage Zest!


Shibori Print Tutorial
What You Will Need

  • Item of clothing suitable for tie dye, prewashed  (dress, shirt, PJ pants, etc. made of 100% cotton, rayon, or silk)
  • Tulip One-Step Tie-Dye, your choice of your color
  • Rubber bands (included in kit above)
  • Gloves (included in kit above)
  • PVC pipe or something similar  (See note below)
  • Plastic wrap
  • Protective surface


Shibori Print Dress on Diane's Vintage Zest!


Before I begin with the step-by-step tie-dye directions, here's a look at what my dress looked like, crafted from the two oversized white T-shirts.  If you want to do make same thing, check back next for next week's tutorial!

Perfectly Purple Summer Dress from Natasha!

This week, I have a post from Natasha of The Telltale Tasha.  You might remember the sewing challenge that we had for a Simple Dress.  Well, I can tell you now that the members of Stitch Once, Rip Twice have totally outdone themselves!  I cannot wait to post the round-up for the challenge in a couple of weeks.  You will be floored.

But lucky you, here's a sneak peek from one of the members!  When I saw the dress from Natasha below, I thought she looked just like a movie star.  No joke.  So, I'm just going to keep my mouth shut now and let the pictures and Natasha herself do the talking.  :)  Enjoy!


********************


"All the other colors are just colors, but purple seems to have a soul..." - Uniek Swain


Hey Vintage Zest readers!!  Natasha here from Diane's sewing group "Stitch Once, Rip Twice" :-D  I'm representing The Telltale Tasha.

Summer style has the ability to be so versatile. Maxi skirts, mini skirts, tank tops, and crop tops, maxi dress and so much more!   I prefer, though, to live in dresses. They're so comfortable and cute!  And super easy because you don't have to coordinate separate pieces!  #win


Perfectly Purple Summer Dress from Natasha! on Diane's Vintage Zest!


This dress is McCall's 6752 View B.


Perfectly Purple Summer Dress from Natasha! on Diane's Vintage Zest!


I figured I've enough wrap bodices for the time being so I opted for the droop neck lol I got this fabric from Fashion Fabric Club.  It is described as Violet Blue Stripe Activewear ... I just call it purple.  Lol!

Pattern Drafting Series from Kathy!

For today's guest post, I have Kathy from SewMuch2Learn with a treat for anyone who sews or loves vintage things.  When Kathy asked if she could contribute a post with tons of details from a vintage pattern drafting book, the nerdy seamstress in me was super excited!  She was worried about it being too much of a rambling post, but if you're a reader of mine, you're already used to my long-windedness.  ;)  Besides, I love seeing how items were made back then, and there are lots of pictures in the post below showing each step.  For those of you who have never drafted a pattern, this should be fairly simple for you to recreate yourself.  Sounds fun, right?

Take it away, Kathy!


********************


Welcome, My name is Kathy and I normally post on SewMuch2Learn but Diane has graciously invited me to host a day for her.  I am also excited that I am guest hosting on one of my favorite blogs, Vintage Zest.  This is my first time hosting so bear with me as I  ramble on.  I am collector of vintage sewing items, where it be buttons, spools of thread, thimbles I love them.  I have managed to collect a few packets that claims to make the perfect pattern, fitted just to your body.  I thought I would give them a try.


Pattern Drafting Series

The Magic Seamstress
Part One


It hails as a home sewing dream come true, an easy way to a perfect fit pattern, all with up to date fashion styling.

My booklet is copyrighted by the American Fashion Institute in 1971


Pattern Drafting Series on Diane's Vintage Zest!


The introduction says that Cinderella solved her fashion problem with a fairy godmother and now Magic Seamstress solve yours.

In essence it is a simple measurement system, using the dot to dot system. It only uses two measurements, bust and hip. It claims that it helps you create a basic pattern, but also offers five variations to create your own fashion styling.

In the back of the book there is a special enlarging rule and a french curve rule.
You will be using these rulers to create your basic shift dress pattern.


Meet Stef, my dress form. She is going to be my partner during this series.

Pattern Drafting Series on Diane's Vintage Zest!


First Step: Measurements 

It is important to use accurate measurements.

Bust Measurement

Place your tape over the bottom part of your shoulder blades and bring forward to measure across the fullest of the breast.


Pattern Drafting Series on Diane's Vintage Zest!


Hip Measurement

Zazu Faure feature & GIVEAWAY!

Zazu Faure feature on Shop Small Saturday Showcase at Diane's Vintage Zest!


Normally, when I pick a feature for Shop Small Saturday Showcase, I don't have too much of a problem finding my favorite items to feature.  Not today...  Zazu from Zazu Faure has the some of the most adorable and unique items.  She has such a sense of imagination, and there were too many amazing items for me not to share with you!  So today, I decided to share photographs of the items in collections.  You'll see what I mean!

And if that isn't enough to interest you, Zazu is offering one of her little escargot, which doubles as a pincushion!  See it above?  Anyways, let's get to the interview!

********************

Zazu Faure feature on Shop Small Saturday Showcase at Diane's Vintage Zest!


Where did the name of your store come from?

Since my given name is Zazu, it seemed silly to waste what my parents gave me.  I operate all my endeavors under the name:  Zazu Faure/Los Angeles.  So no real story there.  I like to keep things simple.


Zazu Faure feature on Shop Small Saturday Showcase at Diane's Vintage Zest!
In the jungle!  Gorillas, rhinoceros, giraffes, elephants, hippos


What is your favorite item?

Upcycled Pant Hems into Sunglasses Sleeve

It has been more than a year since I posted my super popular Sunglasses Case tutorial, and although I am really happy with this project, I sincerely doubt that I will get a fraction of the pageviews that my previous post had.  Why?  Well, this is a funny little project that I put together from my pant hems that I chopped off in the tutorial for hemming pants, so they were little scrap tubes hanging out in my stash.

Some time later, my mom wanted a sunglasses sleeve and I had this fabric from her pants, so I upcycled them into a little sleeve!  Here's a quickie almost-tutorial on how I did it.  :)


Upcycled Pant Hems into Sunglasses Sleeve


The whole reason I am calling this an "almost" tutorial is because I just snapped a few pictures along the way, and even though you will get the main gist from the pictures, it is not a really thorough step-by-step with arrows or a pattern to download.  Here we go!

Sunglasses Sleeve "Tutorial"

What You Will Need

  • Upcycled pant hems
  • Matching thread
  • Sunglasses
  • Sewing machine or needle for hand sewing


Upcycled Pant Hems into Sunglasses Sleeve


Directions

1.  First, turned the fabric inside out with right sides touching.


Upcycled Pant Hems into Sunglasses Sleeve


2.  Sew along the non-finished edge to make a pouch shape.

Challenge #6: Simple Dress Challenge!

Welcome to Stitch Once, Rip Twice's second challenge of 2014!  After our last Simple Top Challenge, which had more participation than the last few combined, we voted on a few different options!

Overwhelmingly, the members of Stitch Once, Rip Twice voted in favor of one choice.  May I present the...


Simple Dress Challenge Announcement on Diane's Vintage Zest!


The Rules
  1. Your simple dress can be for yourself or someone else, and there's no restriction to which pattern, fabric, or style!
  2. It can be made from scratch or refashioned, just as long as you use your sewing skills.
  3. Share anything you would like on your blog or on the group's Facebook page along the way.  That includes patterns, techniques, inspiration, project ideas, problems, and in-progress pictures.
  4. Have your finished dress done and posted by June 15th either on your personal blog or on the Facebook page.  The week after the deadline, I'll put together a wrap-up post with everyone's finished garments so we can all see!

Also, if you have a blog, post the button above by grabbing the code below!  Thanks to Scooter for designing our button.  :)


Simple Dress Challenge Announcement on Diane's Vintage Zest!


Usually, I show a few inspiration images for a particular garment, but this challenge is a simple dress, which could be just about everything!!!  Instead, I will share a few collages of the patterns from my collection, plus a couple of ideas that I am kicking around right now.

I have a whopping 56 dresses in my huge pattern collection, about half of which I definitely don't want to sew because the pattern is too intricate, ugly (I received some for free), or for the winter months so I wouldn't be able to wear it right away!  Here are a few patterns that I have been mulling over...

How to: Turn a T-Shirt into a Baby Bib!

About a month ago, I participated in Someday Crafts' crafting for baby series, which was fun!  You might be thinking, "Diane doesn't have a little one!"  However, although I have no kids yet, I love sewing for all of the little ones that belong to my friends and family.

In fact, today's project is one that I will be gifting to a couple of friends from the gym who are expecting!  The gym owner and I conspired to give a gift made out of one of their logo T-shirts, so now we can claim our youngest member.  :)


How to: Turn a T-Shirt into a Baby Bib! on Diane's Vintage Zest!


By the way, I love the idea of taking all kinds of adult-sized T-shirts to upcycle into bibs.  It would be great for school T-shirts, so your baby can have the same school spirit as you!  Or why not make the little one a bib to support your favorite sports team?  Also, I know that my guy has more than enough company T-shirts that could be upcycled into a cute bib one day.  The possibilities are endless!

Enough with the talk, let's get to the tutorial!


What You Will Need
  • The T-shirt
  • Matching (or contrast) thread to your shirt
  • A pattern
    • I modified this one, but there are so many great patterns out there, like this one!
    • OR you can trace an existing bib, making sure to add seam allowance
    • OR make a pattern of your own!
  • 2 x 2" square of hook & loop tape (AKA Velcro)
  • Pattern weights
  • Sewing machine!
  • Optional, but highly recommended: Flannel lining, for stabilization


How to: Turn a T-Shirt into a Baby Bib! on Diane's Vintage Zest!


Directions

1. First cut up the side seams so you can work with the front and back of the shirts separately.


How to: Turn a T-Shirt into a Baby Bib! on Diane's Vintage Zest!


2.  Before cutting your pattern pieces, make sure that you can center the logo onto the pattern piece by laying it on top.  This may require a couple of edits to your pattern piece.  Coincidentally, mine had the two kinds of problems that you may encounter.  More work for me, but better for this tutorial!

However, if the logo first perfectly onto the pattern piece, go ahead and skip to step 3!

  • If your logo is too large, you can either cut into the logo if it isn't important OR extend the pattern piece a bit, like I showed here.
  • Also, the bib "arms" might go into the neck portion of the piece like mine does.  All you will have to do is cut the piece and add some seam allowance.  See below for the pictures.

Tutorial: Decoupaged Dress Form + Meet Coco!

You might have wondered what happened to Jade (my first duct tape dress form) ever since I made Lily, my new duct tape dress form, with my new tutorial!  Well, honestly she sat in a corner slowly falling apart...  :(  Very sad.  Well, she got a new makeover and I gave her a new name...

Meet Coco!  As you might have noticed, the last two names were named after the color of the tape I used: Jade was green and Lily is white.  Therefore, I wanted to think of a name that would evoke a brown or tan color, and Coco came to mind.  Not only is that the perfect name for my theme, but I love that it reminds me of Coco Chanel!

Make sure to check out the tutorial on how to make your own decoupaged dress form below plus some detailed pictures.  Enjoy!


Meet Coco + Tutorial: Decoupaged Dress Form on Diane's Vintage Zest!


By the way, I am not sure how this would work on other dress form surfaces or as a functioning dress form, but this is meant to be more of a decorative piece since I already have Lily.  I am so looking forward to displaying this in my new guest bedroom craft room!


Meet Coco + Tutorial: Decoupaged Dress Form on Diane's Vintage Zest!


Just a couple of pictures before we get to the tutorial.  Last I left you, Jade was slightly falling apart since I did not stuff or tape her properly.  By the time I picked her up from the corner, the seam had completely fallen apart.  Yeesh!


Meet Coco + Tutorial: Decoupaged Dress Form on Diane's Vintage Zest!


My niece was over, so she helped me!  First, we taped up the back with short sections, and then we placed a long strip up and down the "spine," which I forgot to photograph.

Simple Top Challenge Round-up

Yes!  It is time for another Stitch Once, Rip Twice round-up!  This time, we have eight different projects, four from new members.  :)  For those of you who are beginning sewists or would like to join our virtual sewing group, click here for more info.

Let's get to the garments!


Oh, but if you are unfamiliar with our latest challenge, find out more about the Simple Top Challenge rules and inspiration on this post!


Now, let's get to the garments!

Last week, I shared my own (Refashioned) Simple Top from a $1 swap meet button-down shirt.  Click on over to see how my top turned out, plus the major mistake that turned into a cute detail!

Challenge #5: A (Refashioned) Simple Top!

Today, I actually have a new sewing project to share with you!  Stitch Once, Rip Twice's latest challenge was a Simple Top, and I knew that I had to make something nice and breezy for this 80°F weather we have been having here!

Read on for all of the details, including how I turned a huge mishap into a fashionable detail and how this only cost me $1!

*Update* Check out everyone else's garments here!

Challenge #5: A (Refashioned) Simple Top!: Diane's Vintage Zest!


As you remember, we had a challenge and I had a few ideas in mind when I announced it in this post.  I kept wanting to complicate the design with all kinds of details, but I finally just settled for a really simple top!


Simple Top Challenge Button: Diane's Vintage Zest!


I used Simplicity 1614 from my pattern collection for its breezy silhouette.  I decided to go with version D's front and version A/B's back with the detail.  Already getting not-so-simple...


Challenge #5: A (Refashioned) Simple Top!: Diane's Vintage Zest!


For the fabric, I was going through my enormous fabric stash to find something breezy but not sheer.

Weekly Wrap-Up: Crafting & Crêpes!

This weekend was pretty low-key with lots of crafting!  It was definitely a nice change from all of the furniture window shopping and blog updating that I have been doing in my little bits of free time now that my work has increased by a ton.

Precap:


During the week, I went to Crème de la Crêpe with my mom for a girl's dinner out.  We had so many goodies: crêpes galore, escargots, paté and baguettes.  Magnifique!  Check it all out on The Episodic Eater!


 photo CremedelaCrepe13_zpsda9f6d17.jpg


This weekend, I finally did some crafting.  My niece came over and she helped me with a project that has been on my to do list for forever!  Yay!  I just wanted to share a sneak peek before I have a chance to photograph it with my nice camera.  :)


 photo -303_zpsa2d6f0d6.jpg


We had a bit of time left until my cousin showed up, so my niece and I sewed a little bag to match a pouch we made some time ago.  Here is her cute sketch of the design she had in mind!


 photo NiecesPouch1_zps9288652c.jpg


Challenge #5: A Simple Top!

Welcome to our first challenge of 2014!  It is a brand new year for our sewing group and if you don't know about us yet, click here to learn about Stitch Once, Rip Twice.  You'll find some general information about us, how to join, and links to our past challenges.  Fun!

For our last Mad About Plaid Challenge, we only had a few members finish projects in time for the round-up, so we decided to make things a bit easier this time.  The next assignment for our sewing group members is the...


The Rules
  1. Your simple top can be for yourself or someone else, and there's no restriction to which pattern, fabric, or style!
  2. It can be made from scratch or refashioned, just as long as you use your sewing skills!
  3. Share anything you would like on your blog or on the group's Facebook page along the way.  That includes patterns, techniques, inspiration, project ideas, problems, and in-progress pictures.
  4. Have your finished garment done and posted by March 15th either on your personal blog or on the Facebook page.  The week after the deadline, I'll put together a wrap-up post with everyone's finished garments so we can all see!

Also, if you have a blog, post the button above by grabbing the code below!


Normally, I would show a few inspiration images, but it's really not difficult to come up with a good idea for a simple top!  Instead, I will share a few collages of the patterns from my collection, plus a couple of ideas that I am kicking around right now.

I have about twelve tops in my pattern collection, half of which I definitely don't want to sew because the pattern is too intricate, or just plain ugly.  As you may remember, I have been gifted patterns in the past, which is why I still own them!  The patterns below are in my "no" pile.

Tutorial & Helpful Tips for Sewing Velcro!

Hello again!

It has been forever since I shared a sewing tutorial, and I am so happy to share another mini one with you today!  I have some tips for you on how to sew with hook & loop tape, which most people recognize as Velcro, so the next time you have to replace something, it will be much easier.  :)

Here we go!


First of all, here are the items I had to repair from the gym.  I had a small hole in the glove, which I just pinched together and sewed shut.  Then, my knee brace for my bum knee just would not close anymore.  The fuzzy part of the tape just wasn't sticking anymore, so I broke out the Paisley (my sewing machine) for some repairs!


 photo VelcroTutorial9_zpse8a67d5f.jpg


What You Will Need

  • The item you want to sew
  • Hook & loop tape, matching the color AND length and width you want to apply
  • Pins
  • Sewing machine or needle & thread


Directions

1. First, simulate how you will be using the item.
  • For my knee brace, I put it on and moved around.  Do the same with any garments!
  • For a purse, close the flap with some items inside.

Mad About Plaid Challenge Round-Up!

Hello again!

Some of you might have thought to yourself... what happened to Stitch Once, Rip Twice?  I posted about our Mad About Plaid Challenge and then I shared with you the plans that I had to make a coat.

And then...


...a big fat nothing.  Yep, the holidays came around, and there was complete radio silence on the blog, at least about sewing!  Since this is the first year of my blog, I was completely unaware about how busy I would be to blog/work/shop for gifts/sew/celebrate.  It seems like I am not the only one who was short on time, because we only had four members (including myself) who had time to sew something!

Stitch Once, Rip Twice members did participate in a small holiday swap, which I posted about.  I was set to share my own project last week, but instead I had a mini rant last week when I lost my pictures. Oh well!

It's long overdue, but I really wanted to share the other projects that everyone else made for our challenge!


Mad About Plaid Challenge Round-Up!

This project from Amy at SewNBows one is completely different than what we have had before...

Sunday Synopsis / Stumped on Sunday #2!

Happy Sunday!

As some of you may know, Colette Patterns is having a sewalong for their new Albion pattern and I am so in!  I have never done a sewalong before, and I am ready to try it out!  By the way, the pattern is unisex, so it is a garment for me.  Selfish seamstress over here!  :)

My question to you is...

Where do you buy unique, good-quality notions and fabrics that don't cost an arm and a leg?

Remember, I am still a new sewist, so I cringe at the thought of destroying buying expensive items, but I would still like them to be lovely and unique.  By the way, I totally remember my "Sew My Stash" pledge, but if I need a few toggle closures to finish the coat properly, it's still not breaking my rules.  Yes!


Lastly, here are last week's posts in case you missed any.  :)


Sunday Synopsis!

Holiday Swap Round-up!

Hello again!

Some of you might have thought to yourself... what happened to Stitch Once, Rip Twice?  Remember, my online sewing group with challenges?  Well, it's still around!


Last time we spoke about our little group, I posted about our Mad About Plaid Challenge and then I shared with you the plans that I had to make a coat.

And then...  a big fat nothing.


Or so you thought!

We had an awesome holiday swap!  I matched up pairs of gals and they gifted lots of sewing goodies!
Next week, I promise to show off the completed projects from the last challenge, but first I wanted to share some of the great presents that our members sent and received in our first holiday swap!


Holiday Swap Round-Up!


ChiChi from ChiChi Loves gave Kristin from Sew Classic tons of vintage patterns, notions, and fabric.  Read more about it here.

 photo ChiChitoKristin_zps8e2b03dd.jpg


Kristin from Sew Classic gave ChiChi from ChiChi Loves a whole bunch of patterns, bright fabrics, and embellishments to add to her stash!

 photo KristintoChiChi_zps23f3716f.jpg


Kathy gave Cecilia some beautiful fabric, patterns, and lots of useful little notions!

Sew My Stash Pledge!

This post is up a little late because although I have been thinking about this for a while, I was really nervous to put my thoughts into words that the public can see!

I decided that I have to stick to my guns and not buy fabric for all of 2014.

*Crickets chirping*

So how can I be a sewing blogger without fabric?  Well, believe me, I have that covered.  I have a HUGE fabric stash, and I have only been sewing for just over a year.  I REALLY do not want it to get out of control, so I have been thinking about the decision to commit to sewing my stash.  Now it's in the blogosphere for all to see, and I can't take it back.  Eek!


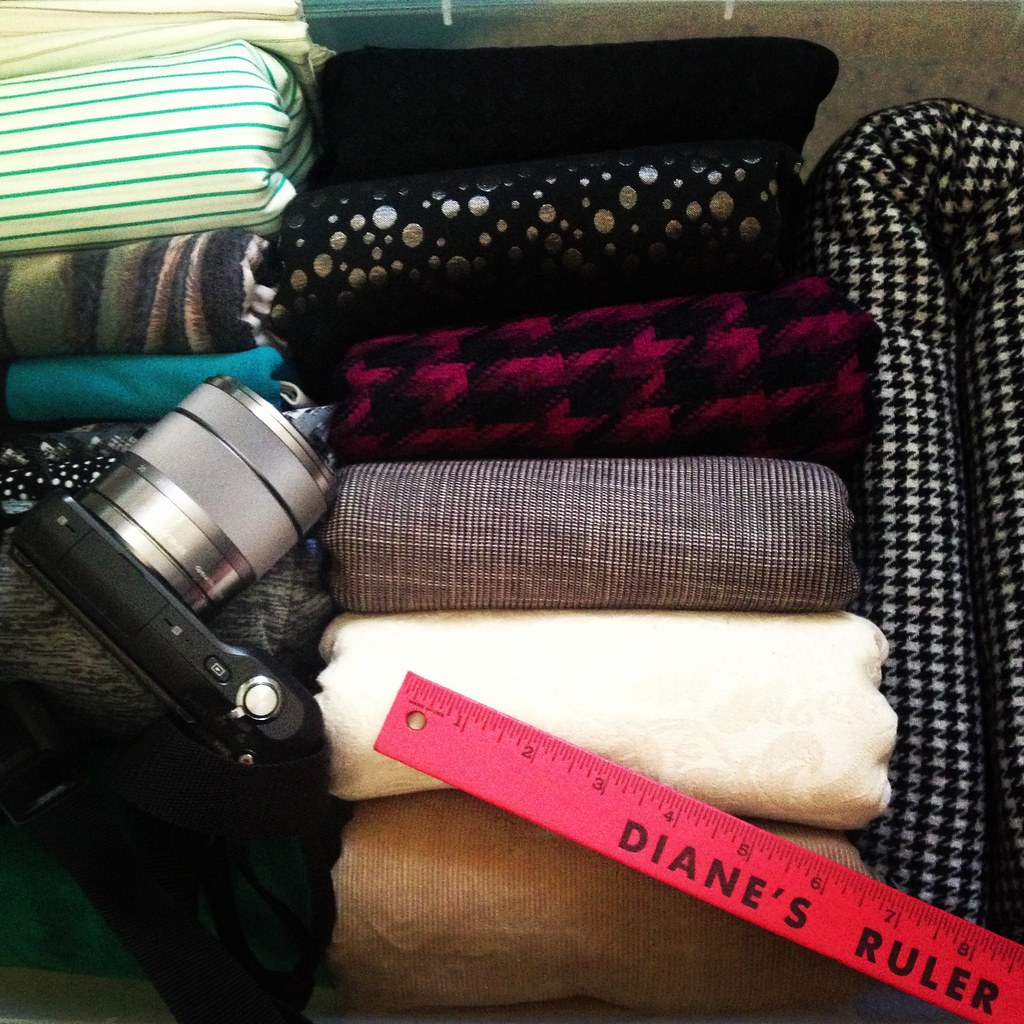
How do I plan to actually get projects done then?  Well, I cataloged and organized my entire stash a few months ago in this post of my entire fabric stash.  That included a TON of folding perfect fabric bundles, using this method.  Now it will be infinitely easier to find fabrics that fit the project that I want to work on!

I have caught myself a few times thinking about heading to the fabric store for inspiration.  But why do that when I practically have a store's worth of fabric in my bins?  I actually need to sew the stash I already own!


So here is my pledge for 2014...  I hope!

My Niece's First Dolls!

Today, I am sharing one of my "friends and family" posts as this week's theme!

You may remember my niece, who I have referred to several times on the blog.  I have taken her school supply shopping, gave her some sewing lessons, and bought her a fab Christmas gift this year!  I mentioned way back in June that we sewed a couple of dolls together, and I'm sharing it with you now.  :)

This is the only picture I have of the dolls because I was too engrossed in our lesson to take any pictures.  Silly me!


The whole reason for the dolls is because my cousin had some of my niece's old baby clothes that they wanted to display.  I already had the doll pattern for Simplicity 1900 below, so it was perfect!


First, we decided to alter the torso sections because they were not quite long enough for the clothes.  Then, my cousin and my niece learned how to lay out and cut pattern pieces properly.  Next, we started assembling all of the dolls while my niece loved threading and rethreading the machine for each color thread.  Maybe I should sew with her permanently!  While sewing, I explained to her all of the steps, and it was so much fun.  :)

.