Diane's Vintage Zest!: crafts

Spicy Chorizo Cornbread Stuffing

A spicy spin on my Cornbread Stuffing that EVERYONE loves!

Sweet Potato Souffle for Thanksgiving

One of my most popular recipes EVER, and just in time for Thanksgiving!

DIY Painted Photo Backdrops

Super easy backdrops for your photo, plus a few tips!

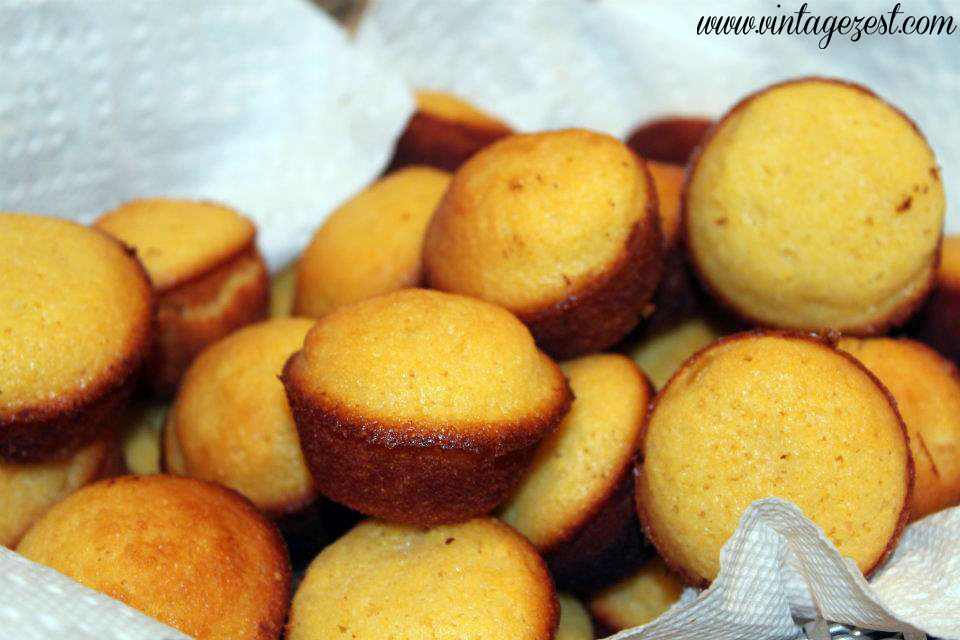
Golden Sweet Corn Bread Mini Muffins

A sweet spin on traditional cornbread!

Easy Sweet Potato Pie (without a crust!)

The easiest (and healthiest) pumpkin pie recipe ever!

Showing posts with label crafts. Show all posts

Gift Guide: for Crafty Gals!


Welcome to my eighth gift guide of the season, for your favorite creative, crafty person!  (Psst...  Check out these links if you missed my other seven gift guides for Travel BugsMenKidsDogsEveryonethe Home, and Tech Geeks!)

I share a few crafts on Vintage Zest from time to time, and I always have a long list of projects that I want to do, skills to learn, and supplies to buy.  Lucky for me, I have friends and family that feed my insane addiction creative passions by gifting me supplies from time to time.

For this Gift Guide, I decided to put together a list of items that almost any creative person would love, from knitters to paper crafters.  Some of these items I have personal experience with, and others, I just want for myself!  Also, I included a few favorite shops from Shop Small Saturday and a few other items that you'll want to add to your shopping list!

Let's get to the guide!


Paper Crafting

Gift Guide: for Crafty Gals on Diane's Vintage Zest!  #holiday #gift #presents

  • Hand-Lettering for Everyone, $10.65 :  I am super jelly of people with pretty writing, so now that I own this book, I'm definitely upping my skills soon!
  • Washi tape, $12.79 for 6 :  A crafty gal can never have too much washi tape.  :)
  • Silhouette Mint, $94.99 :  I want this ASAP!  I already have a looong list of all the stamps I want to make!
  • Silhouette starter kit, $219 :  One of my favorite crafting supplies of all time.  Get this starter bundle kit for a great price!
  • Coloring Flower Mandalas  |  Coloring Ocean Mandalas  |  Coloring Dream Mandalas, $5.39  |  $8.92  |  $7.66 :  These "coloring books for adults" are ALL the rage, and I have all three of these!
  • Paper Jewelry, $29.74 :  Upcycle paper into jewelry with this instructional book.  Two of my faves in one: being eco-friendly and pretty accessories.  :)
  • Photo cube printer, $99.99 :  Make personalized cards in a snap with this printer that print out your favorite photos!
  • 100 Amazing Animal Snowflakes, $15.22 :  Make intricate snowflakes with the help of this helpful instructional book.


The Fiber Arts

Gift Guide: for Crafty Gals on Diane's Vintage Zest!  #holiday #gift #presents

DIY Painted Photo Backdrops


If you follow me on Instagram, you would have seen a sneak peek of the project I am sharing with you today.  It has taken a couple of months, but I wanted to show you exactly how I have been using them for both Vintage Zest and The Episodic Eater!

I made these boards at my first ever food blogger event, which was kismet, because these were on my "To Craft" list for the longest time!  I don't always have the best light to take photos in the kitchen, so sometimes I have to run around the house.  I might end up in the living room and sometimes I have to open the front door and take pictures on the floor!

With the photo backdrops you don't end up seeing an unappetizing couch or flooring under my dishes, so they come in handy!  These were super easy to make, even to this painting newbie.  I chose some crazy colors, but they are customizable to your needs.  Check it out!


DIY Painted Photo Backdrops on Diane's Vintage Zest  #paint #photography #blogging


DIY Painted Photo Backdrops

What You Will Need

  1. Plywood
  2. Paint samples (purchasing small samples is more cost-effective)
  3. Paint brushes and/or paint roller set
  4. Drop cloth
  5. Optional: Rubber gloves
  6. Time!


Directions

Woodworking Project #1: Wood Piece Basket


Last week, I was a little tricky and shared the Wood Scrap Vase as my first woodworking project ever...  But it was really made with the scraps of the project that I'm sharing with you today!

That was just a teaser, but here is the whole process of how I made this Wood Piece Basket!


Wooden Basket (1st woodworking project!) on Diane's Vintage Zest!


By the way, this is not a tutorial.  I just wanted to show off my new-found woodworking skills to you all.  Yay!

********************

I started with this huge piece of lumber taller than me, plus a couple other pieces you'll see later.

I used a table saw to rip it into six skinny pieces on the right.


Wooden Basket (1st woodworking project!) on Diane's Vintage Zest!


Using a chop saw or miter saw, each skinny piece was turned into lots of tiny pieces.

Wooden Basket (1st woodworking project!) on Diane's Vintage Zest!


Then, I sanded each piece down to give the edges a bit of a shape.

Project #0: Wood Scrap Vase


After last week's Woodworking Tip, I promised to share a woodworking project with you...

Well, I kinda lied.  Or maybe I didn't!  I thought I would share this project that I made out of a bunch of scraps from my first project.  Thats why it's Project #0 and not number 1!

It's not the prettiest thing ever, but I'm happy that I made something semi-interesting while practicing using the tools.


Project #0: Wood Scrap Vase on Diane's Vintage Zest!


I attempted to make some type of spiral design and it ended up juuust a little wonky.  Also, I with I had four more pieces to make another layer on the bottom to match the top.

Shibori Print Dress

This is a sponsored post from I Love to Create for the Blueprint Social. #tiedyeyoursummer #tdys


Today, I have a fun oldie-but-goodie craft with a new twist!  I received a package of white T-shirts and beautiful tie dye colors as part of Tie Dye Your Summer.  I put on my thinking cap on how I could make something completely different and it came to me... a Shibori Print Dress!


Shibori Print Dress on Diane's Vintage Zest!


I decided to make it an ombre dress with more saturated colors on top, down to almost white at the bottom.  I love how easy it was to make this dress with the Tulip One-Step Tie-Dye and I definitely want to make a few more items of clothing using this technique.  Want to see how I did it?  Read on for the tutorial!


Shibori Print Dress on Diane's Vintage Zest!


Shibori Print Tutorial
What You Will Need

  • Item of clothing suitable for tie dye, prewashed  (dress, shirt, PJ pants, etc. made of 100% cotton, rayon, or silk)
  • Tulip One-Step Tie-Dye, your choice of your color
  • Rubber bands (included in kit above)
  • Gloves (included in kit above)
  • PVC pipe or something similar  (See note below)
  • Plastic wrap
  • Protective surface


Shibori Print Dress on Diane's Vintage Zest!


Before I begin with the step-by-step tie-dye directions, here's a look at what my dress looked like, crafted from the two oversized white T-shirts.  If you want to do make same thing, check back next for next week's tutorial!

Craft Rewind: Friendship Bracelets

This is my last craft rewind post!  At least until I find more boxes stuffed with old projects.  :)  I have shared all of my past sewingcrochetknittingcross-stitching, and lanyards, and I will end on friendship bracelets!

Yep, that summer camp staple of friendship bracelets, which I loved when I was a kid.  I ended up making some fancier ones as I got older, which you can see below...


Craft Rewind: Friendship Bracelets on Diane's Vintage Zest!


I liked using a rainbow of colors, and it was really fun to make different patterns too.  Now, let me point out a couple of special ones.


Craft Rewind: Friendship Bracelets on Diane's Vintage Zest!


This one had a rubber cord that gave it a 3-dimensional look.  Notice that it is slightly wavy?  I think it was part of the plan, but I'm not sure...

20+ Mason Jar Crafts & Recipes

This week, I wanted to do something a little different than the last two roundups of Blueberry & Stawberry recipes.  This time, I have over 20 Mason jar crafts and recipes from the lovely linkers at Do Tell Tuesday!  At first, I was only going to include crafts, but I couldn't help but share a couple cute recipes in jars too.  :)  Looks like I have lots of uses for all those jars that I've been collecting.

Next week, I will be featuring LASAGNA recipes, so make sure to link them up tomorrow at Do Tell Tuesday!


Now, for the Mason jar crafts & recipes!


20+ Mason Jar Crafts and Recipes on Diane's Vintage Zest!


20+ Mason Jar Crafts and Recipes on Diane's Vintage Zest!


20+ Mason Jar Crafts and Recipes on Diane's Vintage Zest!


20+ Mason Jar Crafts and Recipes on Diane's Vintage Zest!


Craft Rewind: Lanyards

It's time for another Craft Rewind!  I have already shared a ton of past sewing, crochet, knitting, and cross-stitching projects.  This time, it's a craft that I learned during summer camp.  How appropriate!  I made all of these when I was a kid because I was absolutely obsessed with making lanyards every summer.  I guess the crafting bug bit me early!


Craft Rewind: Lanyards on Diane's Vintage Zest!


The one on the very left is the first lanyard that I learned how to twist, instead of just making it a square/rectangle.


Craft Rewind: Lanyards on Diane's Vintage Zest!


Of course, I started off with easy 2 x 2 square lanyards, which were usually very long.


Craft Rewind: Lanyards on Diane's Vintage Zest!


THEN, I started making larger ones: 2 x 3 and 3 x 3.  I liked the twisty ones better, once I learned how to make them.

Summertime Wreath from Katy!

Today's guest post is from Katy from An Inside To My Heart, one awesome scrapbooking and card making lady!  When she was interested in guest posting, I asked if she might use some of her skills to making something home decor-related and she whipped up this super cute summertime wreath!  Ready for the tutorial?  Check it out!


********************

Summertime Wreath on Diane's Vintage Zest!


I'm so excited to be helping out Diane of Vintage Zest...her projects have inspired me and I hope I can do the same with this SUPER SIMPLE Summertime Wreath made from supplies you probably have at home.


You will need:
  • Styrofoam Wreath (preferably the kind that doesn't flake off)
  • Ribbon or Tulle
  • 4 sheets of 12x12 Scrapbook Paper (I doubled one of my patterns but you could use 4 different patterns if you want).
  • 1" push pens
  • 3-D Foam Squares

Directions

Wrap Wreath with Ribbon or Tulle until all the Styrofoam is covered.


Summertime Wreath on Diane's Vintage Zest!

Craft Rewind: Cross-Stitching

Continuing with my craft rewind series of posts, I am bringing to you the very first craft that I remember seriously spending time doing.  I remember going to the store with my mom to buy new patterns, and I am sure that my mom still has a bunch of them!

Anyways, here are a few of my earliest creations.  :)


Craft Rewind: Cross-Stitching on Diane's Vintage Zest!


I don't know that this actually counts, but this is the very, very first cross stitching that I did.  It is obviously a kid's version of cross-stitching from when I was really young.  I actually remember doing this and having an "Aha!" moment when the picture started to form.  I was hooked!


Craft Rewind: Cross-Stitching on Diane's Vintage Zest!


There are a few other ones that I remember doing, but I couldn't find them right away in my mom's stash.  One of the first ones that I remember making was a rabbit wearing a bonnet and bloomers.  Also, I stitched a few gifts as well, so there is no access to those...  :(

I remember making this one in high school, and my mom hung this up in the hallway between my bedroom and my sister's.  Cute!  It still hangs there nowadays.  :)

Zazu Faure feature & GIVEAWAY!

Zazu Faure feature on Shop Small Saturday Showcase at Diane's Vintage Zest!


Normally, when I pick a feature for Shop Small Saturday Showcase, I don't have too much of a problem finding my favorite items to feature.  Not today...  Zazu from Zazu Faure has the some of the most adorable and unique items.  She has such a sense of imagination, and there were too many amazing items for me not to share with you!  So today, I decided to share photographs of the items in collections.  You'll see what I mean!

And if that isn't enough to interest you, Zazu is offering one of her little escargot, which doubles as a pincushion!  See it above?  Anyways, let's get to the interview!

********************

Zazu Faure feature on Shop Small Saturday Showcase at Diane's Vintage Zest!


Where did the name of your store come from?

Since my given name is Zazu, it seemed silly to waste what my parents gave me.  I operate all my endeavors under the name:  Zazu Faure/Los Angeles.  So no real story there.  I like to keep things simple.


Zazu Faure feature on Shop Small Saturday Showcase at Diane's Vintage Zest!
In the jungle!  Gorillas, rhinoceros, giraffes, elephants, hippos


What is your favorite item?

Craft Rewind: Knitting!

Since I am busy studying for my test, I will have a series of rewind posts for my normal craft Wednesdays of items I made in the past, before blogging.

First up, everything I have ever knitted!  I first learned how to crochet in college and did it for a while, remember this post and this post?  I wanted to learn how to make something different, so I taught myself knitting out of a book.  :)


Craft Rewind: Knitting! on Diane's Vintage Zest!


This was the first thing I ever knitted.  I was excited to a cable knit sweater, which seemed like a good idea...until I realized that I don't know how to read patterns!  So for a long time, I had a rectangle of knit fabric, which was unused.  Bummer.

Later on, my friend suggested that I turn it into a purse, so I knit up the side, crocheted a flower, and added some handles.


Craft Rewind: Knitting! on Diane's Vintage Zest!


Not exactly my style, but still fun for a first project!


Craft Rewind: Knitting! on Diane's Vintage Zest!


My second project was a scarf!  I actually love this pattern a lot, but it is very subtle.

Cell Phone Charger Holder (upcycled from a lotion bottle!)

Today I have a project that I have been meaning to make for a long, long time!  If you happen to follow my Pinterest account, you still might not have seen this project that I pinned because it was from 2 years ago!!!

This is not a super-detailed tutorial because the original from Make It & Love It is just fantastic and you can definitely refer to it!  However, I did make a few tweaks, so don't leave just yet!


Cell Phone Charger Holder (upcycled from a lotion bottle!) on Diane's Vintage Zest!


Oh, and are you wondering why you would even want this?  Well, just think about all those times you have to charge your cell phone and leave it on the icky floor.  Or sometimes the cord is too short, and you have to leave it hanging.  :(  Well you no longer have to do that!  Let's get to the quasi-tutorial.  :)


Cell Phone Charger Holder
What You Will Need

  • Empty Lotion Bottle
  • Marking pencil or pen
  • Scissors
  • Box cutter & protective surface (cutting board, cardboard, etc.)
  • Optional:  Fabric & Mod Podge


Directions

1.  Remove all stickers and labels.


Cell Phone Charger Holder (upcycled from a lotion bottle!) on Diane's Vintage Zest!


2.  Mark your pattern!  Check out the original tutorial if you want to make the shape she suggests.  However, I wanted to do something different...

Tutorial: Decoupaged Dress Form + Meet Coco!

You might have wondered what happened to Jade (my first duct tape dress form) ever since I made Lily, my new duct tape dress form, with my new tutorial!  Well, honestly she sat in a corner slowly falling apart...  :(  Very sad.  Well, she got a new makeover and I gave her a new name...

Meet Coco!  As you might have noticed, the last two names were named after the color of the tape I used: Jade was green and Lily is white.  Therefore, I wanted to think of a name that would evoke a brown or tan color, and Coco came to mind.  Not only is that the perfect name for my theme, but I love that it reminds me of Coco Chanel!

Make sure to check out the tutorial on how to make your own decoupaged dress form below plus some detailed pictures.  Enjoy!


Meet Coco + Tutorial: Decoupaged Dress Form on Diane's Vintage Zest!


By the way, I am not sure how this would work on other dress form surfaces or as a functioning dress form, but this is meant to be more of a decorative piece since I already have Lily.  I am so looking forward to displaying this in my new guest bedroom craft room!


Meet Coco + Tutorial: Decoupaged Dress Form on Diane's Vintage Zest!


Just a couple of pictures before we get to the tutorial.  Last I left you, Jade was slightly falling apart since I did not stuff or tape her properly.  By the time I picked her up from the corner, the seam had completely fallen apart.  Yeesh!


Meet Coco + Tutorial: Decoupaged Dress Form on Diane's Vintage Zest!


My niece was over, so she helped me!  First, we taped up the back with short sections, and then we placed a long strip up and down the "spine," which I forgot to photograph.

DIY Stenciled Nautical Beach Tote!

This sponsored post is brought to you by Plaid and Blueprint Social, but all opinions are 100% mine!


As you know by now, I just love to create!  I work with just about everything, like fabric, yarn, vinyl, paper, and even wood!  But I have a little confession for you...  I am scared when it comes to painting.  For real.  When I was a younger and other kids had birthday parties at our local ceramic painting shop, I was completely nervous about "messing up" with my design.  I would stick to straight lines or polkadots if I was feeling "adventurous."  ;)  However, lately I have been itching to try painting more, especially with the new house (yay!) and some woodworking projects I have in mind.  Luckily, I found out about the new Stencil1 line of stencils from Ed Roth, which are perfect for a newbie painter like me!  Along with FolkArt Multi-Surface paints, I created a pretty Stenciled Nautical Beach Tote, perfect for spring and summer trips!


#shop #Stencil1 #cbias DIY Stenciled Nautical Beach Tote


Before I start with the tutorial, let me clue you in on a few of the supplies I used.  When you pick up your own Stencil1 stencils, they come in a variety of designs from floral, honeycomb, British-themed, scallops, and so much more!  They are available at Jo-Ann Fabric & Craft stores and are perfect for walls, floors and furniture.  I suspect there may be a stenciled wall in my future?  :)


#shop #Stencil1 #cbias DIY Stenciled Nautical Beach Tote


For my project, I used the FolkArt Multi-Surface paints, which are great for practically any surface, both indoor and outdoor!  I mean, check out the fine print on the back... they are even dishwasher safe!


#shop #Stencil1 #cbias DIY Stenciled Nautical Beach Tote


My set of stencils came with three designs: rope, an anchor, and a star.  All of the stencils are made of a durable, reusable mylar, which is super easy to clean!

Weekly Wrap-Up: Crafting & Crêpes!

This weekend was pretty low-key with lots of crafting!  It was definitely a nice change from all of the furniture window shopping and blog updating that I have been doing in my little bits of free time now that my work has increased by a ton.

Precap:


During the week, I went to Crème de la Crêpe with my mom for a girl's dinner out.  We had so many goodies: crêpes galore, escargots, paté and baguettes.  Magnifique!  Check it all out on The Episodic Eater!


 photo CremedelaCrepe13_zpsda9f6d17.jpg


This weekend, I finally did some crafting.  My niece came over and she helped me with a project that has been on my to do list for forever!  Yay!  I just wanted to share a sneak peek before I have a chance to photograph it with my nice camera.  :)


 photo -303_zpsa2d6f0d6.jpg


We had a bit of time left until my cousin showed up, so my niece and I sewed a little bag to match a pouch we made some time ago.  Here is her cute sketch of the design she had in mind!


 photo NiecesPouch1_zps9288652c.jpg


Weekly Wrap-Up: Crafted at the Port of Los Angeles, B-day dinner & X-mas!

It's the last weekly wrap-up of the 2013!  I cannot believe how time flies!  These weekly wrap-ups have totally evolved this past year, but I'll chat about it a bit later.  :)


Precap (jump to):


Saturday

I convinced my guy that we should head to Crafted at the Port of Los Angeles for some last minute Christmas shopping!


It is located in San Pedro where the weather is absolutely amazing!  For this weekend, there was a special little Mom and Pop Up shop from the SoCal Etsy Guild for the holidays.


Weekly Wrap-Up on Vintage Zest


But first, I had to pop in and say hello to my friends at the Artisan Candle Company, who mentioned that I should drop by their permanent store after meeting them at Patchwork Santa Ana.  What a great suggestion!  On Instagram, I shared the candle that I picked out here.  It was a really hard choice!


Weekly Wrap-Up on Vintage Zest


It was especially a fun time because we were introduced to the Crafted's Executive Director and Leasing Director, who gave us a tour and introduced us around a bit.  Also, they gave us an inside scoop on their current location and their plans to open up a brewery, testing kitchen, and food artisan selling area for the building next door.  It sounds amazing, and I can't wait for that to open up!  By the way, this is all after filming their three separate segments on KTLA and staying up late for the Happy Hour shopping the previous day.  How nice of them, right?

Also, I had a chance to visit more vendors that I can't wait to feature on the Shop Small Saturday Showcase series soon.  I loved so many of the vendors, and my guy enjoyed his beer tasting while I did my rounds.  See, it is perfect for both crafty and non-crafty folks!  :)


Weekly Wrap-Up on Vintage Zest


Here are a few pictures from the non-vendor areas of Crafted.  A DIY ornament station, a photo booth, a free gift wrapping station, and a 10 foot tall wire baby art piece.  Yep, you read that right!

Patchwork Show Wrap-Up & "25 Days of Handmade Gifts" Series!

Last week, I posted about how excited I was to attend the Patchwork Show in Long Beach!  I gave you guys a little preview and had the chance to ask Nicole & Delilah (the awesome founders/organizers of Patchwork) a few questions too.

Today, I'll share as much of the show as I had the chance to photograph.  It was really huge this year!  I had a chance to speak with a bunch of really talented and creative folks and peruse their wonderful handmade goods.  In fact, it was so amazing that I have more than enough folks to cover my next series just in time for the holidays...

25 Days of Handmade Gifts!

For all of the details on the amazing shops involved, interviews with the creators, and giveaways, read on.  But first, on with the (Patchwork) Show!


First of all, can I make you guys jealous?  The walk up to the festival is along the beach, which was only made better by the perfect weather we had!


**1 Entrance


About ready to enter the show, there were tons of people shopping and more than enough handmade goods to go around!


**3 Entrance booth


Located at different spots were all kinds of fun things.  I totally missed the kids DIY, but I'm sure I didn't meet the age requirement.  :)


Here's one of the music tents with an awesome band that had the crowd rocking out.


**108 Music


The ukulele group was so cute!


**129 Music


As for the food, I did a terrible job of documenting what I ate that day.  I had an Avocado Taco from the vegan Seabirds Truck and more tacos from Piaggio on Wheels!  It's the perfect street food.  :)  I was tempted to get a potato from Tornado Potato, but I had some shopping to do!

********************

Mini-Disclaimer Time: There were sooo many awesome vendors and it was impossible to visit all of the booths.  I made my way through almost the entire space and these are the ones that I handpicked to share with you.  They're not giving me anything in return for the features, I just really wanted to promote the handmade movement with some amazing shops where you can get a unique and creative gift.  Show them some love by visiting their stores and stay tuned for the "25 Days of Handmade Gifts" series for posts dedicated to my favorites plus some extras for y'all!

********************

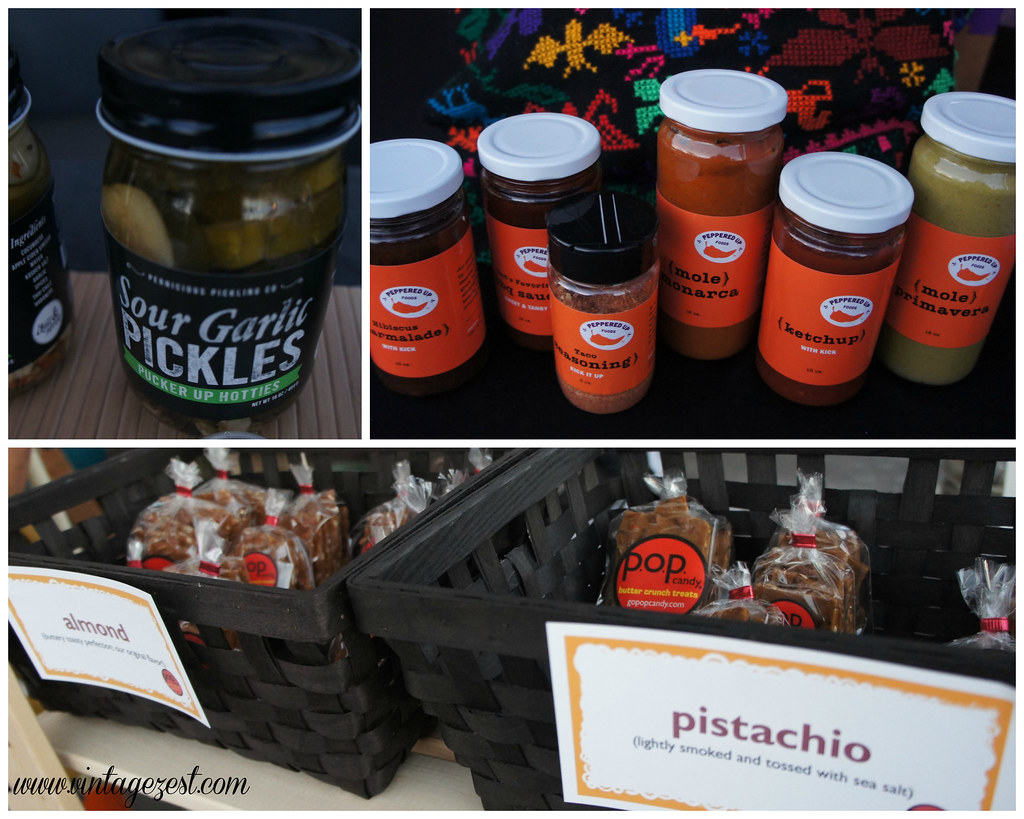
Besides the food trucks along the side offering delicious treats, there were plenty of food artisans with delicious items for sale.  Lucky for me, there were samples of everything and I put together a few of my favorite items to share with you!


Want to give a deliciously perfect gift?

Pernicious Pickling Co:  Have you tried Sour Garlic pickles?  How about Pickled Cauliflower or Pickled Red Onion?  No?  You have to try them!  These guys had so many varieties of pickles to try that I was in heaven.  :)  *Feature & promo here!*

Peppered Up Foods: Griselda introduced me to Peppered Up Foods' entire line of sauces and seasonings.  These sauces, some of them straight from her grandmother, are so awesome that she uses them at her restaurant Sliced and Diced.  *Feature and giveaway here!*

P.O.P. Candy Co.: Maybe this is a little unfair, but I bought this candy at one of my first Patchwork Shows and have been buying it ever since.  I knew this was one of my features before I even arrived!  They have so many great flavors from Pecan to Rosemary Almond and even had two new ones this time: Hot Curry and Carrot Cake.  Yum!  *Feature and giveaway here!*


*Patchwork LB - Food Collage

.